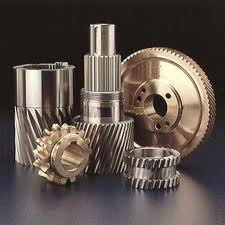
Gears undoubtedly occupy a critical place in mechanical design. Name any mechanical device and it is sure to have gears in one form or the other. They have found a wide range of applications in our lives. To understand the importance of gears is to understand our advancement to the present industrial age. Gears are the essential element for devices requiring transfer of motion and power for rotation.
Today gears are applied in every sphere where there is any need for power transfer. It would not be any exaggeration to say that gear production and its allied sectors form one of the key constituents of the global economy. The market is often divided into four major divisions; Automotive, Industrial, Marine and Aerospace. Combined it is estimated that the global gear market is worth more than $53 billion USD with the automotive sector forming the single largest group in gear applications. Traditionally the market leaders have included the Western European countries, North America, and some regions ofAsia. With major markets now arising in regions likeChina,India, andEastern Europethe demand for innovative gear metrology products continues to outpace development and availability.
Gear production is one of the most difficult tasks to be found in modern manufacturing. Producing complex, non-linear, three-dimensional geometries in hard, strong materials with an extremely high level of precision is a daunting challenge in its own right. Inspecting the results of the various manufacturing operations to assure consistent quality and performance is even more difficult. Quality assurance is extremely important for gears, because manufacturing imperfections tend to manifest themselves as noise and vibration, which are completely unacceptable in most applications.
Stringent requirements, higher loads and the trend towards miniaturization to save weight and space are forcing transmission gear designers to increasingly tighten the surface finish, bore size and bore-to-face perpendicularity tolerances on the bores of transmission gears. Autonetics began looking at alternative methods of inspection in response to customer requests for a system that was faster, easier to use, less expensive, and provided uncompromising accuracy. The ultimate goal was a system that could be used on the shop floor for real-time inspection of gears in various stages of production without the need for skilled setup personnel or multiple masters and other components. In terms of accuracy, Autonetics diametrical and face bore inspection system is better than the traditional approach. While existing air gages and gimbal systems typically provide results in the 5 to 10 micron range, our inspection system repeats to 1 micron. This exceeds the industry standard, which requires a minimum accuracy of 10-percent of the part tolerance.
The AN-B1287e operating principal incorporates the latest developments in sub-micron optical gaging and nanometer resolution parallel kinematics micro-positioning systems. Our advanced software with neural networking analyzes thousands of measurements per second and using geometrical equations provide results through a select human machine interface. The end product is a one touch gear inspection method easily integrated into your production stream and quality control infrastructure.


