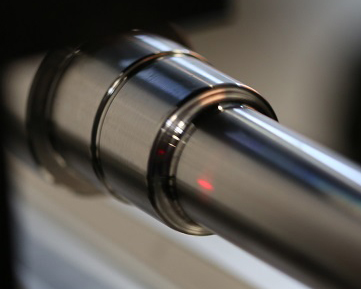
Laser sensors for dimensional metrology continue to become smaller, faster, and smarter. Quality control engineers are eager to use laser metrology for nondestructive inspections to improve manufacturing process control. However, deciding which laser measuring devices are best suited for their in-process part inspections is intimidating.
Quality control engineers often select off-the-shelf part inspection gauging units from companies with a showroom, sales quotas and persuasive sales personnel. Typically, those who take this “safest” route soon discover they wasted money on expensive unneeded features and still did not receive a precise part inspection solution. Off-the-shelf solutions often end up requiring much more training and customization than budgeted.
Custom automated in-process part inspection solutions by Autonetics are not limited by laser sensors gathering dust on a shelf or by the laser measurement systems on a showroom floor. Every detail in an Autonetics automated part inspection project focuses on the client’s unique situation. The only allegiance is to the repeatability, accuracy, and integration of the gauging solution into the manufacturing process. Therefore, we utilize both in-house and off-the-shelf laser measurement sensors most appropriate for a given situation.
Autonetics first evaluates the relationships and interdependencies between cycle times, dimensional data callout requirements, tolerances, surface areas, individual part sizes, part family size ranges, part handling, personnel involvement and other details specific to the client’s manufacturing process. This initial evaluation is critical in the selection of a proven, cutting-edge laser measurement sensor to precisely engineer an automated nondestructive inspection.
Once the analysis is complete, appropriate non-contact measurement sensors are selected. After encasing the sensors in ruggedized enclosures, an integrated nondestructive inspection solution is then developed around each factory-floor-ready laser sensor. A recent project involved the measurement of a part family with 40+ parts manufactured by multiple CNCs in a large work cell.
The Autonetics solution – a single part inspection gauging unit designed to measure all 40+ parts. A critical element in this project was the initial integration of part family profiles into the laser measurement system. After project launch, the quality control engineer is given the option to update the part profiles onsite or have us manage this process remotely as needed.
In this multi-part inspection project, a robotic arm delivers a part to the inspection station. A signal to the Autonetics unit advances the tail stock locator into position. Once the tail stock is engaged and the part held, the robot will ungrip the part and retract from the laser inspection gauge. Upon completion of the inspection, the robot returns to the gauge, grips the part, signals the tail stock to retract, and then removes the part from the gauge. Based on the gauge results, the robot will either place the GOOD part on the appropriate exit conveyor or place it on a REJECT chute to exit the work cell. Each part’s data is kept for 100% traceability and integrated into the machining process for perpetual quality control.
Based in Cary, NC, Autonetics custom develops non-contact laser measurement gauge solutions designed to operate in the most uncompromising of machining environments. Every component that makes up the gauging hardware is vetted in industrial applications and has a proven track record. Autonetics customized measurement gauges for nondestructive inspections can be safely installed at any step of the manufacturing process, are extremely reliable, and require little-to-no maintenance.


